


Discover everything you need to know about the best armor sets ranked in Windrose, including how to get them.
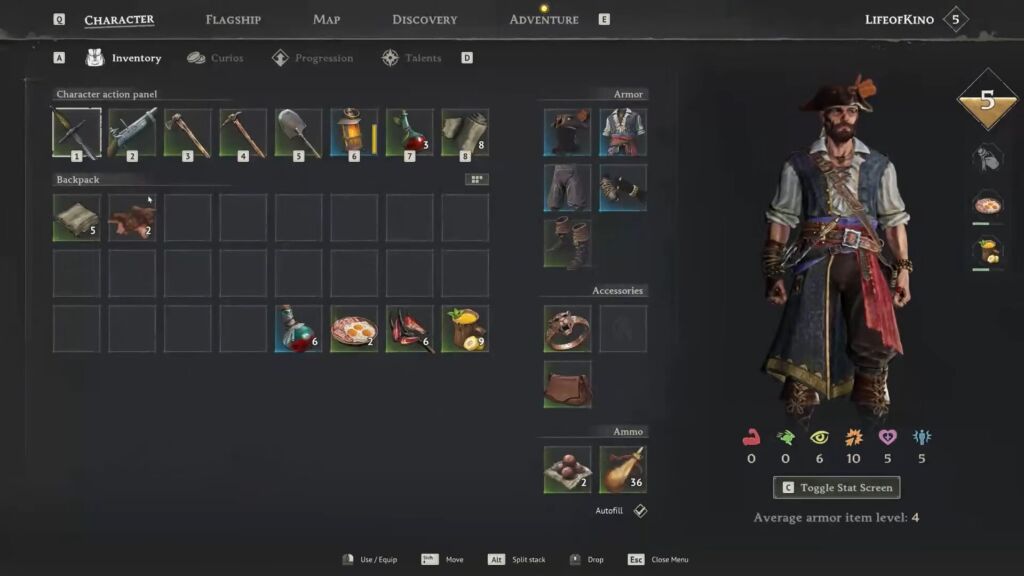
Windrose has a full armor system in Windrose, and it’s one of the most important gameplay mechanics. Your armor choice defines your build more than almost anything else. Every armor piece fits into one of these slots, and together they form a set. Armor works on a set bonus system that changes how you fight. Choosing the equipment for your build can be confusing for most players, so bring the best armor sets ranked list in Windrose to help you equip the best one.
Armors in Windrose
Armor in Windrose is your main defensive and build-defining gear system. They just don’t mitigate the incoming damage, but also change your playstyle. You equip armor across 5 slots, and each piece contributes to your survivability. They increase your ability to take less damage and survive longer. But higher-tier armor gives better protection and stats. You can also increase its effectiveness by upgrading it using the required materials. Armor in Windrose revolves heavily around set bonuses.
Best Armors Ranked
- 2-piece bonus gives a small but useful buff
- 4-piece bonus grants a powerful effect that defines builds
The game doesn’t force you to wear a full armor set, so prefer mixing 2 + 2 pieces from different sets. Doing so lets you gain two separate 2-piece bonuses, which are stronger than full sets in many builds. Each armor set is designed for a specific playstyle, like tank, melee, and ranged. You unlock the armor’s blueprint via vendors and craft armor at the workshop. After that, you upgrade it through levels to upgrade its rarity. There’s no durability for the armor, so it doesn’t break or need repairs.
Best Armors Ranked
Choosing the best armor for your build is essential to gain maximum buffs or bonuses while fighting the enemies in combat. Make sure the armor you choose has a major effect or a new ability. Weak sets have low impact and give situational bonuses. The best armor is ranked based on how well it fits a build.
- Strength Build: Pikeman
- Melee Build: Flibustier
- Ranged Build: Marksman
- Tank builds: Conquistador
Strong armor can become weak if it doesn’t match your weapon or stats. You can combine 2 pieces from Set A and 2 pieces from Set B to gain two strong 2-piece bonuses at once. It’s worth mentioning that the hybrid builds are often stronger than full 4-piece sets. Armor also gets ranked based on base stats, like a high rarity one gives better armor value. Good armor is ranked higher if it works best in the mid-late game.
1. Conquistador’s Armor
- 2-Piece Bonus: +15% Damage Resistance
- 4-Piece Bonus: Grants the “Bulwark” passive
Conquistador’s Armor is the best in our ranked list due to its 2-piece and 4-piece bonuses in Windrose. This is a rare heavy plate armor set that is well-known for its tanky playstyle. It focuses more on damage reduction and survivability. Most heavy melee builds that use weapons like Greatswords, halberds, and clubs include this armor set.

Conquistador’s Armor
The 2-piece bonus is one of the best defensive bonuses in the game. The Bulwark lets your armor not be interrupted by enemy hits. This allows you to finish heavy attacks without getting staggered and heal or attack through enemy pressure. The reason I put this armor on top is that the flat damage reduction is always useful, and Bulwark adds a unique mechanic. Prefer equipping this armor if you’re running a tank build or using heavy weapons.
| Armor Piece | Required Materials |
| Flibustier’s Glove | Coarse Fabric x2, Rough Hide x2 |
| Flibustier’s Hat | Coarse Fabric x2, Rough Hide x3 |
| Flibustier’s Jacket | Coarse Fabric x2, Rough Hide x4 |
| Flibustier’s Shoes | Coarse Fabric x2, Rough Hide x2 |
| Flibustier’s Pants | Coarse Fabric x2, Rough Hide x3 |
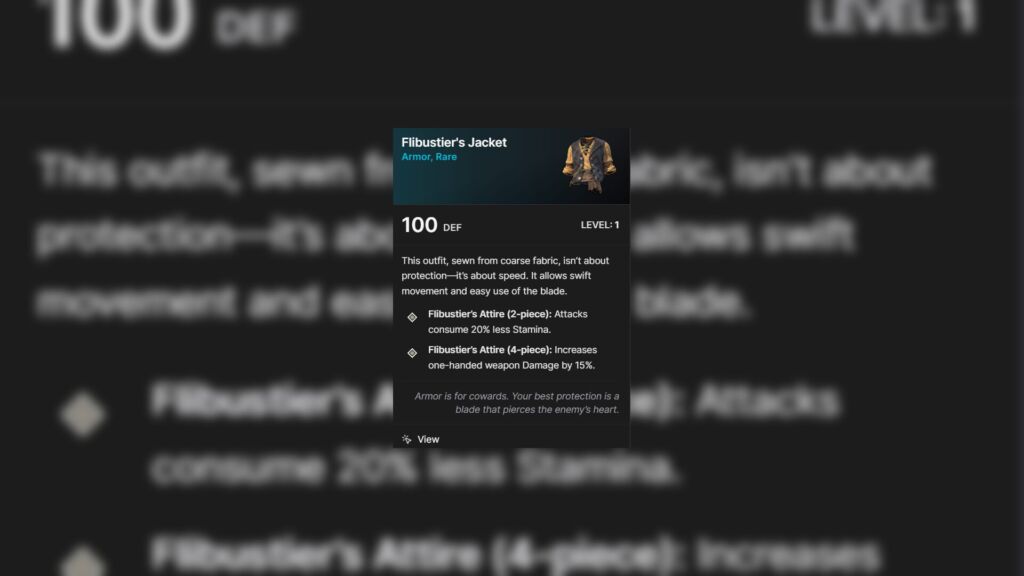
2. Flibustier’s Attire
- 2-piece bonus: Attacks consume 20% less stamina
- 4-piece bonus: +15% one-handed weapon damage
Flibustier’s Attire is the second-best armor in our ranked list and is designed for fast, aggressive melee combat in Windrose. It focuses more on speed, stamina, efficiency, and sustained attacks, making it perfect for players using rapiers and sabers. The 2-piece bonus allows you to attack more times and dodge more often during a fight. Having more stamina lets you stay aggressive longer.
Flibustier’s Attire
The 4-piece bonus directly boosts rapier builds and saber builds. You get long combos and constant pressure with this armor equipped. This allows 4-5 hit chains instead of 2–3 hits, letting you overwhelm enemies with continuous attacks.
| Armor Piece | Required Materials |
| Flibustier’s Glove | Coarse Fabric x2, Rough Hide x2 |
| Flibustier’s Hat | Coarse Fabric x2, Rough Hide x3 |
| Flibustier’s Jacket | Coarse Fabric x2, Rough Hide x4 |
| Flibustier’s Shoes | Coarse Fabric x2, Rough Hide x2 |
| Flibustier’s Pants | Coarse Fabric x2, Rough Hide x3 |
3. Privateer’s Regalia
- 2-piece bonus: +10% Critical Hit Chance
- 4-piece bonus: +10% Critical Damage per nearby enemy
Privateer’s Regalia is the third-best armor in our ranked list due to its Critical Hit Chance and Critical Damage effects. This armor offers the most aggressive playstyles in the game and is perfect for players who want huge burst damage through crits, not survivability. The 2-piece bonus works all the time and boosts overall DPS immediately. The 4-piece bonus is much weaker in 1v1 boss fights, but reaches full power in group fights.

Privateer’s Regalia
Get ready to jump into groups and burst enemies with crits while wearing Privateer’s Regalia in Windrose. This armor is good, but very situational because it can reach very high damage output in crowd fights. So, this needs multiple enemies to shine and underperforms in boss fights or 1v1. I recommend using a 2-piece Privateer, not a full set. This is because the 4-piece bonus is too situational, so add Flibustier for additional stamina or crit DPS, and Pikeman for crit or survivability.
| Armor Piece | Required Materials |
| Privateer’s Boot | Coarse Fabric x4, Rough Hide x2 |
| Privateer’s Doublet | Coarse Fabric x7, Rough Hide x2 |
| Privateer’s Glove | Coarse Fabric x4, Rough Hide x2 |
| Privateer’s Hat | Coarse Fabric x5, Rough Hide x2 |
| Privateer’s Pants | Coarse Fabric x5, Rough Hide x2 |
4. Tracker’s Leathers
- 2-piece bonus: +35% healing effectiveness
- 4-piece bonus: +10-15% damage resistance
Tracker’s Leathers is the next in line and is a Rare light leather armor set that focuses on healing, sustain, and support gameplay. This armor is designed for healer roles and sustain-heavy solo builds. The 2-piece bonus gives stronger bandages, potions, and healing skills, making every heal valuable.
Tracker’s Leathers
The 4-piece bonus mitigates the incoming damage, increasing your survivability. Equipping this armor allows you to stay in fights longer and recover HP quickly. Early-game crafting for these pieces requires Rough Hides and Coarse Fabrics. This is ideal for combat-heavy situations, especially when paired with damage-reduction items.
| Armor Piece | Required Materials |
| Tracker’s Pants | Coarse Fabric x2, Rough Hide x3 |
| Tracker’s Boots | Coarse Fabric x2, Rough Hide x2 |
| Tracker’s Gloves | Coarse Fabric x2, Rough Hide x2 |
| Tracker’s Hat | Coarse Fabric x2, Rough Hide x3 |
| Tracker’s Jacket | Coarse Fabric x2, Rough Hide x4 |
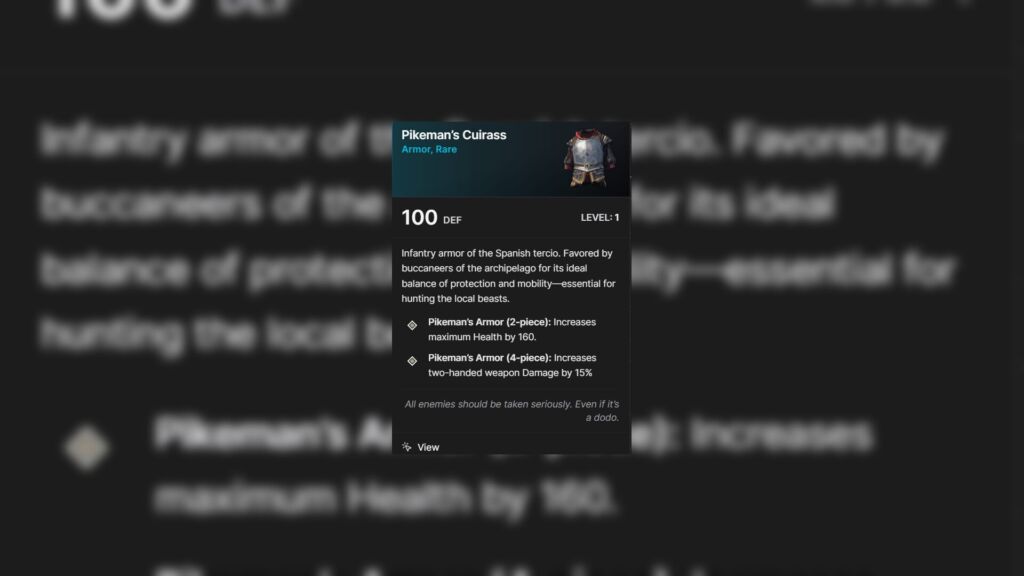
5. Pikeman’s Armor
- 2-piece: +15% damage to two-handed weapons
- 4-piece: +200 HP
Pikeman’s Armor is the second-lowest armor in our ranked list due to its set bonuses in Windrose. This is a Rare heavy plate armor set that is designed for high HP and two-handed weapon damage. It’s a perfect armor for the players using Heavy Clubs, Halberds, and Greatswords. The 2-piece bonus gives you a big health boost early–mid game, allowing you to survive extra hits.
Pikeman’s Armor
The 4-piece bonus increases the damage of the heavy weapons. The set bonuses combine offense and defense better than many sets. Pikeman’s Armor loses value if you’re not using Strength builds. It works extremely well in 2+2 hybrid setups like Pikeman (2) + Conquistador (2), Pikeman (2) + Flibustier (2), and Pikeman (2) + Privateer (2).
| Armor Piece | Required Materials |
| Pikeman’s Boots | Copper Ingot x2, Coarse Fabric x1, Rough Hide x1 |
| Pikeman’s Cuirass | Copper Ingot x4, Coarse Fabric x1, Rough Hide x1 |
| Pikeman’s Gloves | Copper Ingot x2, Coarse Fabric x1, Rough Hide x1 |
| Pikeman’s Helmet | Copper Ingot x3, Coarse Fabric x1, Rough Hide x1 |
| Pikeman’s Pants | Copper Ingot x3, Coarse Fabric x1, Rough Hide x1 |
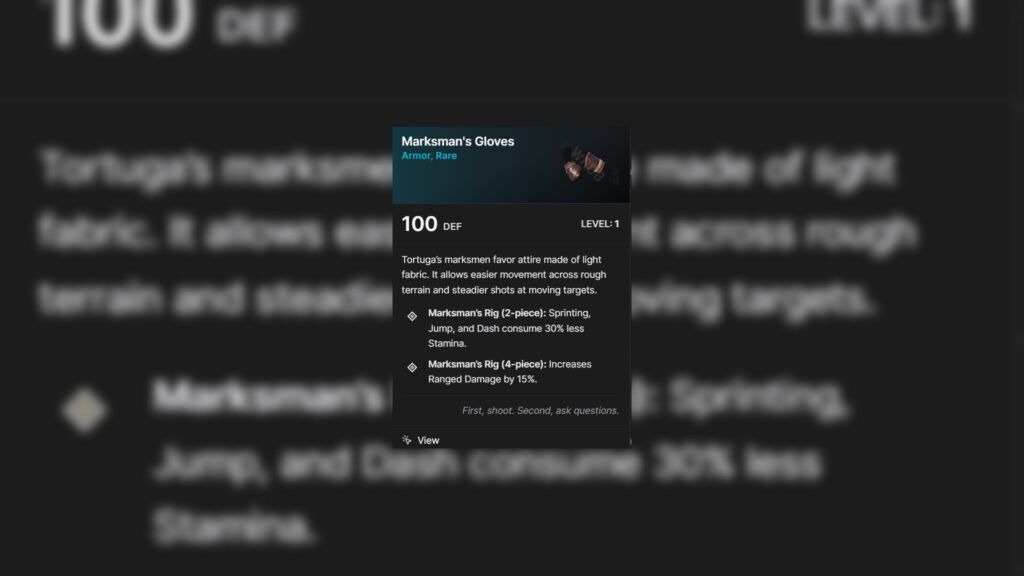
6. Marksman’s Rig
- 2-Piece Bonus: -30% Stamina drain for sprinting, jumping, and dodging
- 4-Piece Bonus: +15% Damage to ranged weapons
Marksman’s Rig is the lowest armor in our ranked list due to its limitation in set bonuses. This light armor set is designed for mobility, stamina efficiency, and ranged combat. It focuses on movement, stamina, and ranged damage output. The 2-piece bonus lets you dodge more often, reposition easily, and stay longer.
Marksman’s Rig
The 4-piece bonus increases your overall DPS from distance and with Pistols and Muskets. Equipping the Marksman’s Rig lets you stay mobile, kite enemies, and attack from range. This is extremely valuable early and mid-game because dodging and stamina management are crucial. Prefer making a 2-piece combo like Marksman (2) + Flibustier (2) for stamina build and Marksman (2) + Conquistador (2) for mobility.
| Armor Piece | Required Materials |
| Marksman’s Tricorne | Coarse Fabric x5, Rough Hide x2 |
| Marksman’s Doublet | Coarse Fabric x7, Rough Hide x2 |
| Marksman’s Gloves | Coarse Fabric x4, Rough Hide x2 |
| Marksman’s Pants | Coarse Fabric x5, Rough Hide x2 |
| Marksman’s Boots | Coarse Fabric x4, Rough Hide x2 |
Now that we’ve discussed which are the best armor sets and what are the best 2-piece combos, equip your favorite one to start a run.


