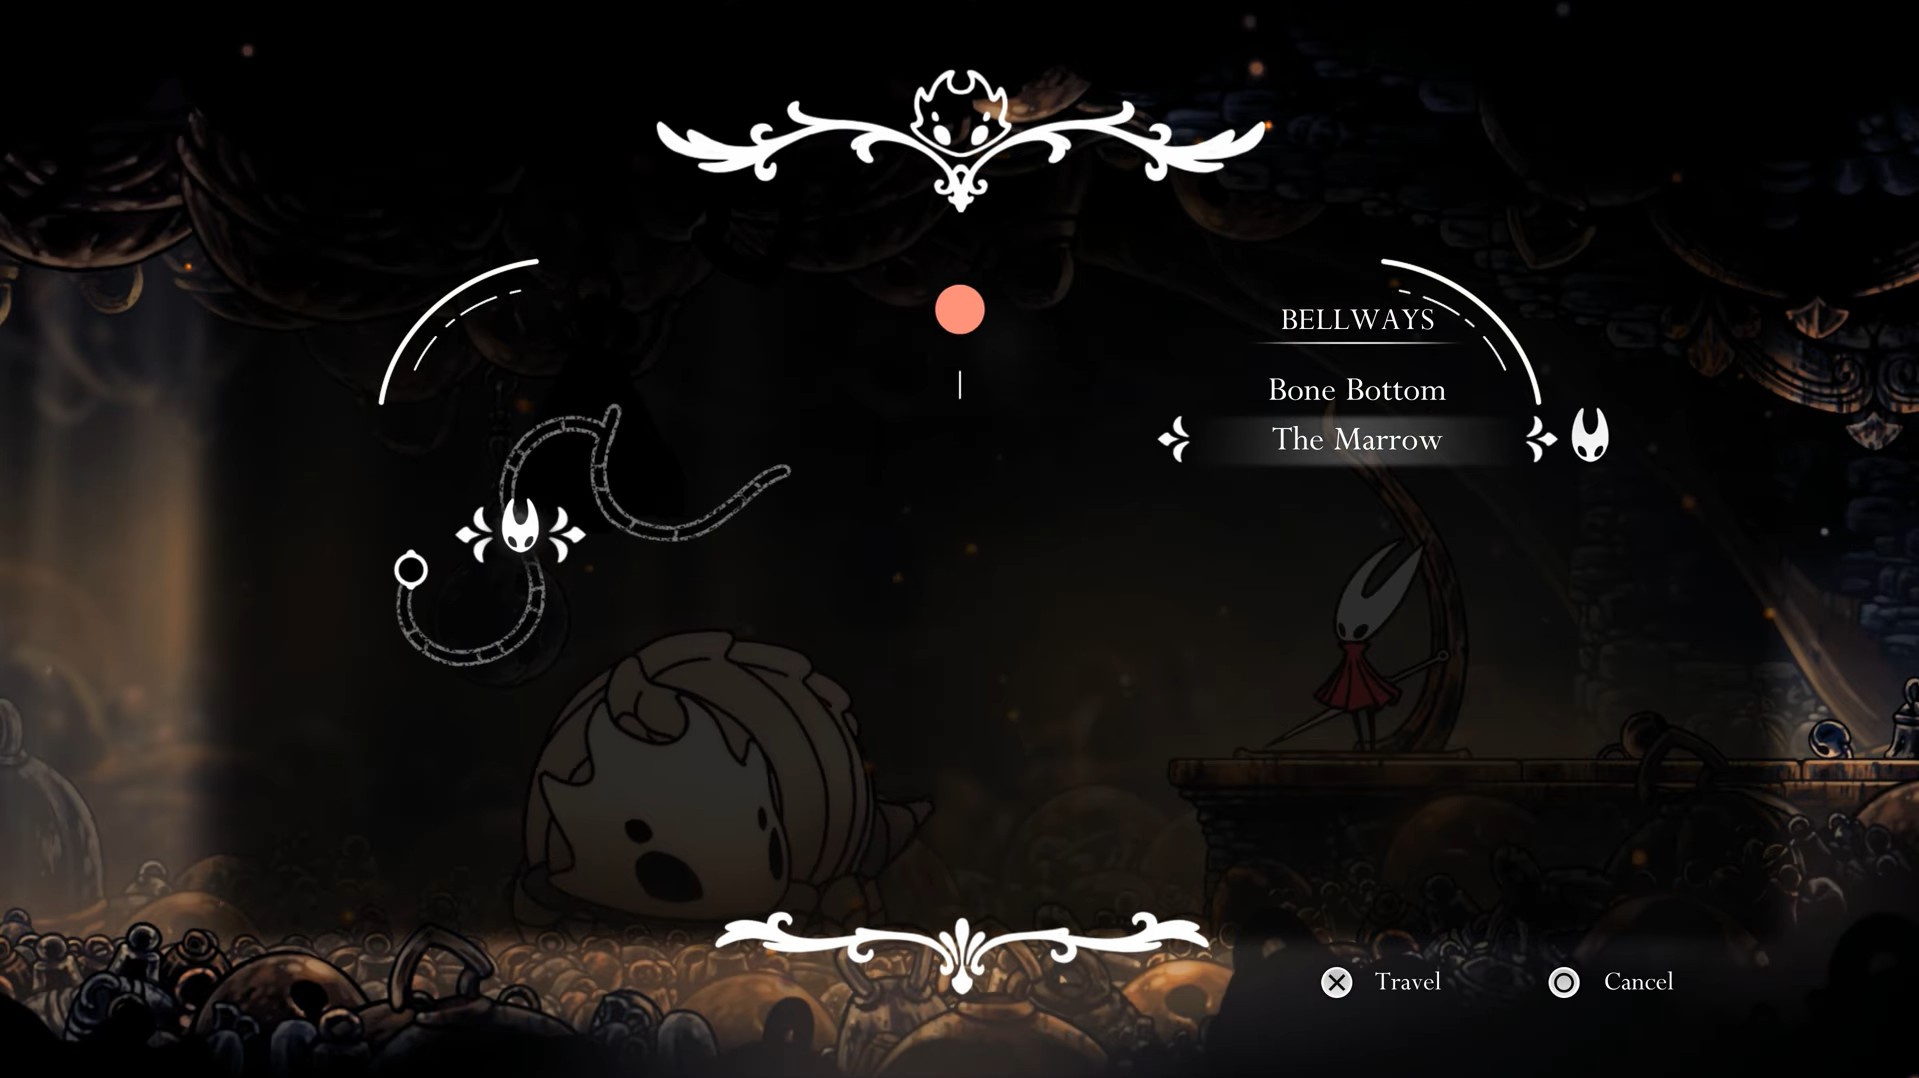
Discover everything you need to know about fast travel in Hollow Knight Silksong, including all the Bellway stations in Pharloom.
Fast Travel in Hollow Knight Silksong is a feature that allows you to move between distant regions of Pharloom. Unlocking the Bellway Stations is essential to fast travel in the game. Travel to The Marrow and defeat the Bell Beast to unlock Fast Travel.
Use a small number of Rosaries to activate the Bellway. Use this feature to move from one place to another, allowing you to complete the quests easily. A point will come when you’re standing like in Deep Docks, but want to travel to Moss Grotto, and that’s where Fast Travel will be handy. Bell Beast is a challenging boss, so use the right strategy to defeat this boss. In this guide, we’ll discuss how to fast travel in Hollow Knight Silksong and some useful tips to defeat Bell Beast.
Unlocking Fast Travel in Hollow Knight: Silksong
Defeat the Bell Beast in The Marrow to unlock fast travel in Hollow Knight Silksong. The first Bellway station becomes available after defeating the boss. Now, you need to find other Bellway stations around Pharloom and unlock them to fast travel. You need a small amount of Rosary to activate the Bellway. Unlocking a Bellway costs 50 Rosaries. You can fast travel between any unlocked Bellways once the Bellway is unlocked.
Get Silkspear Ability
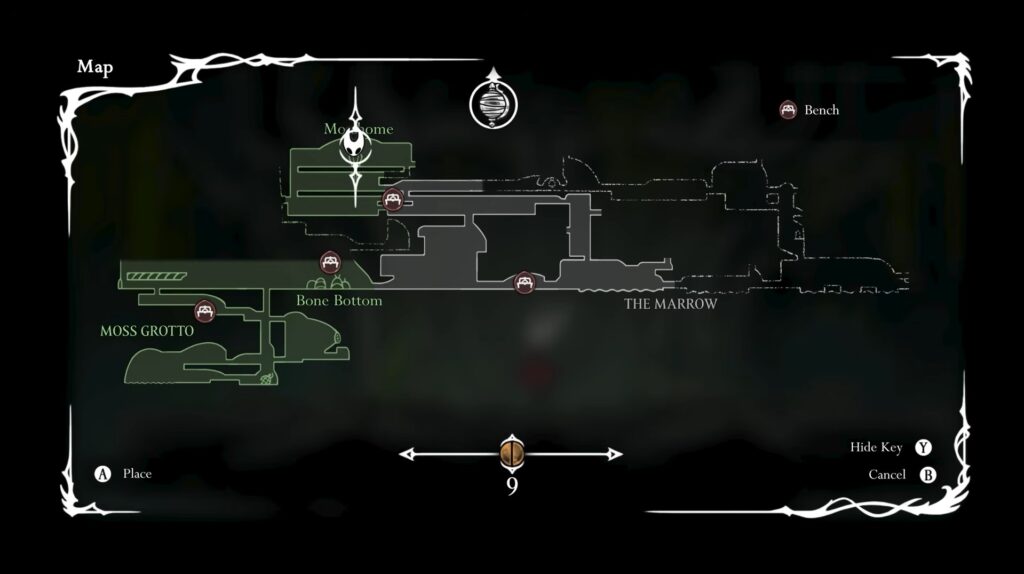
Make your way to reach Mosshome at the top of the Moss Grotto if you want to unlock fast travel in Hollow Knight Silksong. Now, travel to The Marrow to free the Bell Beast using Silkspear’s ability. Defeat the enemies in Mosshome and start moving up.
Move to the west of the Shaman NPC, then drop down to the chamber below and move further west. This will bring you back to a chamber you’ve previously been in. Drop down to a bottom level and move east to get back towards the Shakra NPC. Feel free to drop down there and use the bench if you want a closer spawn point for this next boss fight.
To unlock fast travel, you first need to free the Bell Beast with your Silkspear ability. After that, defeat it in a fairly difficult boss battle.
How To Defeat Bell Beast

The Bell Beast’s attacks are fairly punishing, dealing two damage each. However, it has only three attack variations. They are telegraphed by the type of ground rumbling that occurs just before it emerges. If the plume of the rumbling is medium height and wide, then the beast will emerge and charge. This is the easiest setup for you to get some damage. If the plume is just as wide but significantly taller, then the beast will perform a leap attack.
You need to stay under it and wait for it to land, then get a couple of strikes in. Finally, if the plume is narrow, then the Bell Beast will briefly emerge and throw out a couple of bells that bounce out and to the sides. This move is tricky to get any damage in on, as you have to watch out for the bells.
Phase 2 is fairly similar to phase 1, but with the addition of an extra bell drop with each of the beast’s 3 major moves. Its hard-hitting attacks can make the fight feel really overwhelming, especially if you rush in unprepared. Focus on landing the attack while keeping an eye on your health.
You can avoid using Silkspear for range damage and prioritize using health restoration with Bind instead. Make sure to attack the silk first with your standard attack to restore some resources and use Bind. After that, charge up the Silkspear to break it and start the battle. The beast does a few key attack patterns in phase 1.
Unlocking Fast Travel
After defeating the Bell Beast, you can interact with the floating orb. After that, go through a small platforming section before interacting with a second floating orb. You will consume Silk Heart, which gives you a small regenerative capacity for silk.
Returning to the Bellways, you can jump up and to the right to unlock your first fast travel post. Keep in mind that Rosaries are lost upon death. However, you can pick them up from the place where you die if you break the cocoon left in that area.
Finding Bell Beast (Step-by-Step)
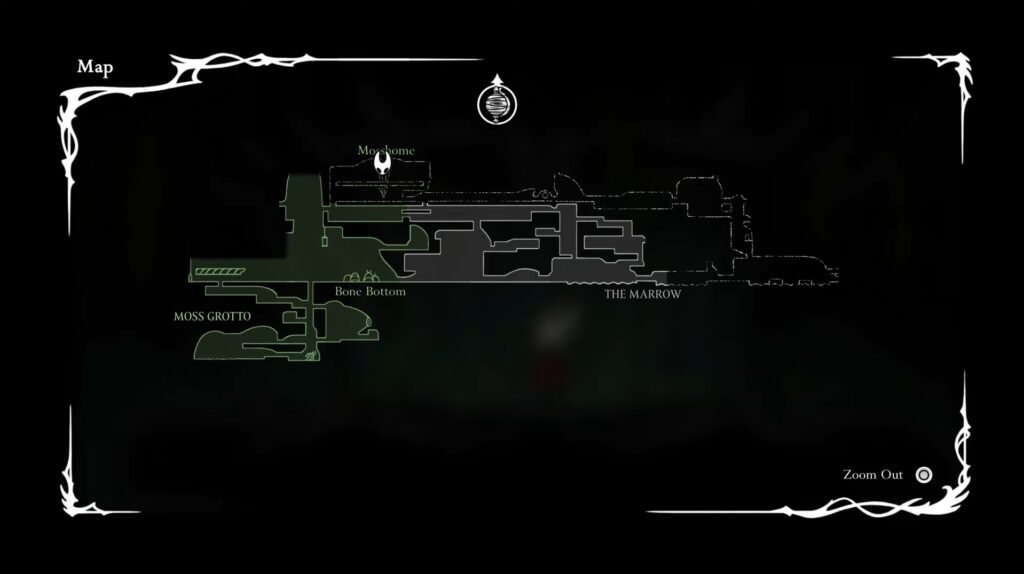
Below are all the steps you need to follow to locate the Bell Beast in Hollow Knight Silksong.
- Move to the right from Bone Bottom to reach The Marrow.
- Keep moving till you find the Shakra.
- Travel to the left from Shakra’s location and reach up to get to the Mosshome.
- Move up from the platform in this room.
- Move to the left to hit the lever, allowing you to unlock a shortcut for Bone Bottom.
- After that, move upward and keep moving until you find the symbol of Weaver.
- You gain the Silkspear ability by interacting with it.
- Now, keep running till you cross the sign of pointing chevrons in the room above the Shakra.
- Move to the right side till you encounter the Bell Beast.
All Bellway Locations
Below are all the Bellway locations in Hollow Knight Silksong.
| Bellway | Location |
|---|---|
| Mosslands | Located in the Bone Bottom pilgrim outpost. Make your way to the middle of Little Pilgrim and Pebb’s shop. |
| The Marrow | The same location where you defeat the Bell Beast. Move to the northmost Mosslands exit from the center horizontal path. |
| Deep Docks | Located in the bottom left of this region. Drop down the main vertical platform area and travel through the tunnel at the bottom left. |
| Far Fields | Move along the top platforms of the main area and past the two red enemies. |
| Greymoor | Located under the Halfway Home. After that, drop down and keep moving to the right. |
| Bellhart | Move between the Shellwood and Greymoor entrances to get to the merchant rest point. |
| Shellwood | Located at the west near the west of Blasted Steps. |
| Blasted Steps | Located at the top, so make sure to climb up the area. |
Defeat the Bell Beast in The Marrow to unlock the Fast Travel feature in Hollow Knight Silksong. Find and unlock a second fast travel Bellway to use it.