


Discover everything you need to know about the Hunter’s March walkthrough in Hollow Knight Silksong, including how to defeat Savage Beastfly.
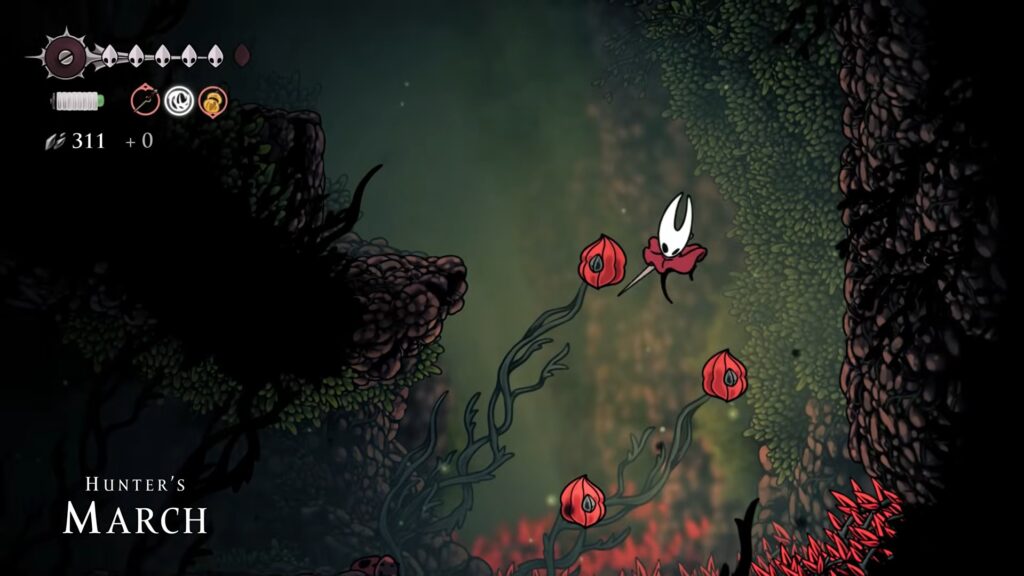
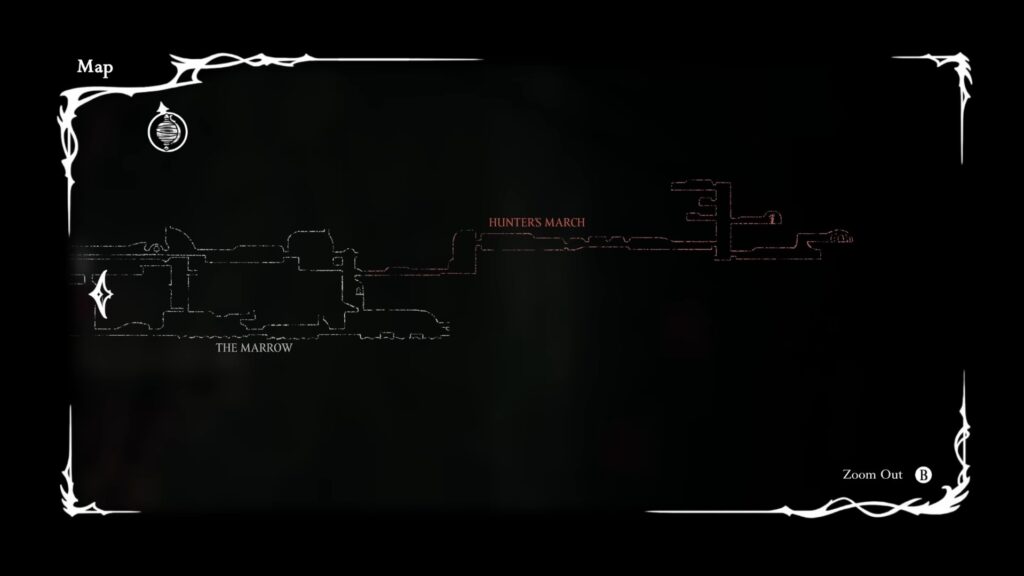
Hunter’s March in Hollow Knight Silksong is a mid-game area located adjacent to The Marrow in Pharloom. Go deeper into The Marrow, defeat a red ant boss guarding one of the entrances to get inside the Hunter’s March. There are multiple bosses, like Skarrgard at the entrance and Savage Beastfly in the Chapel of the Beast.
Be aware of the deadly traps scattered all around in this region. One of the main rewards is the Crest of the Beast, which is obtained after defeating the Savage Beastfly. Progressing through this area can be challenging due to the numerous threats lurking in this region. In this guide, we’ll discuss how to progress in Hunter’s March, including some tips and tricks to defeat Savage Beastfly.
Get Inside the Hunter’s March
The Hunter’s March entrance is in The Marrow. Make your way to the area where you encountered the Bell Beast. Travel to the right after moving into this location. Keep moving to the end drop-down from the hole. Find the door at the bottom to get inside the next chamber. The guardian of the Hunter’s March is located in this area; it will start attacking you once you’re near it. Defeating this boss allows yoy to gain access to the area of Hunter’s March in Hollow Knight Silksong.
Defeat Hunter’s March Guardian

This boss has deadly attacks and can kill you with a few hits. Get inside the Hunter’s March after defeating it. As soon as the fight starts, you need to hit him three times. After that, quickly move to the left so that he can’t jump at you. When the Hunter’s March Guardian disappears, you will be alerted when there’s no smoke on the ground so you can walk to the opposite side. Avoid going to the largest part of the stage because he might jump at you.
To heal, you will use the same strategy. Simply walk to the opposite side as soon as you see smoke and wait for it to hit so you can heal. Jumping and moving backward is the only way to avoid its attack. After that, you can hit him once and dodge again. Walking to the opposite side without having to jump also allows you to avoid some of its attacks.
He may seem like a difficult boss at first, but it’s a matter of practice. Pogo off his head and try not to take any damage. It’s a lot easier to dodge his attacks whenever you’re pogoing off his head. Killing this mini-boss doesn’t grant you any reward. However, you will gain access to Hunter’s March. This is the new area that has benches and a vendor that sells items.
Obtain a Bevy of Rosaries
Make sure you’ve already unlocked the Cling Grip ability before heading into the Hunter’s March. Jump up the wall at the entrance using this ability. You can use the downward slash ability to get through the bulbs to get to the new area. Ant is located on the above platform, so be sure to take them out. Move to the above platform and get rid of the flying creature over there.
Move to the left path after defeating the flying creature. Jump off the spikes and find the flea in the cage. Free the flea and make your way back to the split to move to the right path. Jump over the platform to get inside the next chamber. Get to the top of the platform and get inside the left side to collect a group of rosaries.
Acquire Silk Collection
Move to the top of this area and defeat the aggressive enemy over there. Eliminating this foe is not challenging, as a few hits from your upgraded needle can finish him off. Wait for this downward strike to slash the enemy. Move to the right path after defeating this enemy to defeat more enemies in the next chamber. Use the right strategy and abilities to defeat them effectively. Jump over the above platform to get your hands on the silk after defeating the ant.
Speak with Gilly
Pass through the platform and defeat the enemies below. Be aware of the trap on the top and jump into the cave above to collect Shell Shards. Be aware of the traps on the ground, as they get visible when you’re close to them. Use the Drifter’s Cloak ability in the next chamber to move to the top. Jump off the bulbs to get to the specific point.
There’s a bone door at the bottom left, where you unlock a path to Deep Docks. Two entries await you in the center of the large shaft. The bench on the left side on surrounded by a trap. Move to the left side to get through the open wall. Move to the right door to speak with Gilly.
Defeat Starrgard
Move back and take the exit above the bench to get your hands on the Shell Shards. Move to the left side to locate an entry over there. Cross the gaps and avoid the traps on the floor to reach the far end of this area. Here, you will encounter Mottled Skarr.
Purchase the weapons and items from this NPC. Head to the left and defeat the other Skarrgard over there after moving to the top of the shaft. You need to defeat this boss, along with his ally. Learn their attack pattern to defeat them effectively. Collect the caches of Rosaries after beating these enemies. Drop down to the bottom right exit after moving all the way back to the shaft.
Enter the Chapel of the Beast
Use the Drifter’s Cloak ability for the next jump in this area. Use your weapon to defeat the ant wielding a sword. After that, keep moving to locate a gust of wind in the next chamber. Jump over the platform to reach the far end and collect the Memory Locket by breaking the cage. Move to the top by simply riding the wind. Keep moving to the right till you enter the Chapel of the Beast.
Locate Savage Beastfly
Ride the wind once you move to the far right and jump into the wind to get to the further right side. Get to the left to get all the way to the top after jumping on the bulbs. Continue traveling to the left and avoid the spikes at the end by using the Drifter’s Cloak ability. Watch out for the deadly spikes and move into the other path after getting to the bottom. Cages will be opened, and the enemies will come out of them to attack you. Be aware of the nasty enemy who is wielding the scissor to attack you.
Pass through the gap by defeating the small bug moving into this area. Use the needle to hit him and avoid the spike traps. Get access to the bone door after moving down to the next chamber. Moving inside allows you to encounter the Savage Beastfly.
Defeat the Savage Beastfly
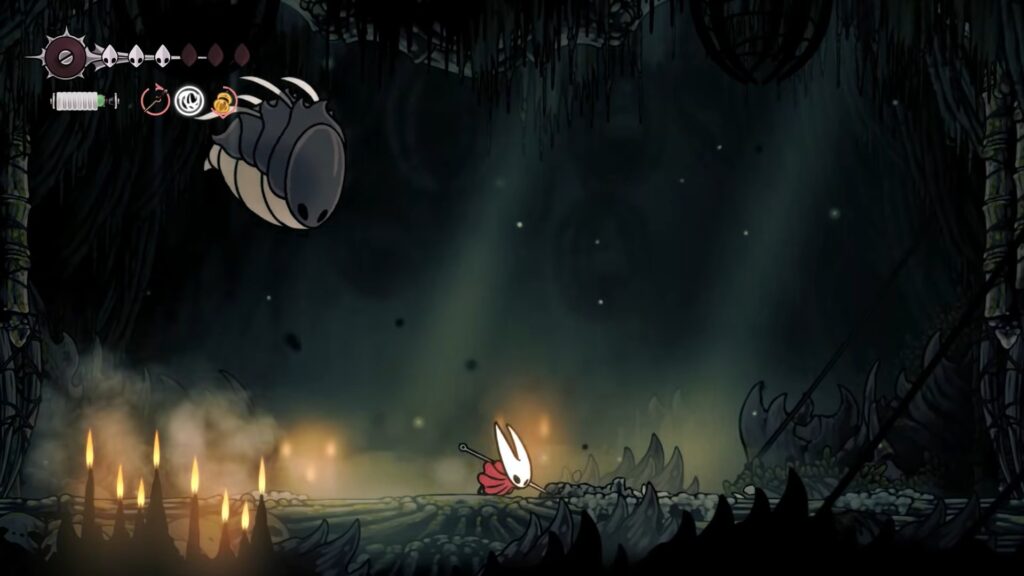
The Savage Beastfly can be a very hard boss to get through at first since he is such a massive target in a small arena. This boss deals two masks of damage on contact or any attack, all while spawning in ads. You’ll mainly be dealing damage by pogoing off him and lots of jumping upward attacks. For his first attack, you can do charges across the arena based on the position of Hornet. The charge is an attack you want to pogo off of every time he does it, if he does it close to the ground.
If you’re not good at pogoing using the base hunter crest, you can try out other move sets like the Wanderer and Reaper crest. This is because they both have downwards attacks that go directly down instead of diagonal, making it easier to pogo. For his other attack, he rolls up in the air and does up to three smash attacks on the ground. Don’t need to go for upward attacks or attacking him in the air, allowing you to play the fight safely.
His last attack is a roar that summons two random creatures to fall into the arena. Prioritize the Ads before the room gets overcrowded. You can kill these enemies normally by ignoring the boss, but the best way to take them is by having the Savage Beastfly use its smash attack to smash the enemies underneath it.
Move into the next chamber and interact with a husk to get your hands on the Crest of the Beast after defeating this boss. Now, you’ve completed your journey in Hunter’s March.


